One of the coolest things about having a house again is that I can build stuff. Nicole asked me to make some planter beds for a rooftop herb garden she wants to start. I found several DIYs online, but faced a couple challenges:
- I wanted a raised/standing design because Nic has back problems.
- I wanted to minimize weight because they’re going on a deck.
In coming up with the design I considered soil depth for what Nic wanted to plant, total soil volume and weight, load limits of the deck (I asked the architect), Nic’s height (to figure how high to raise them), and where she wanted to put them.
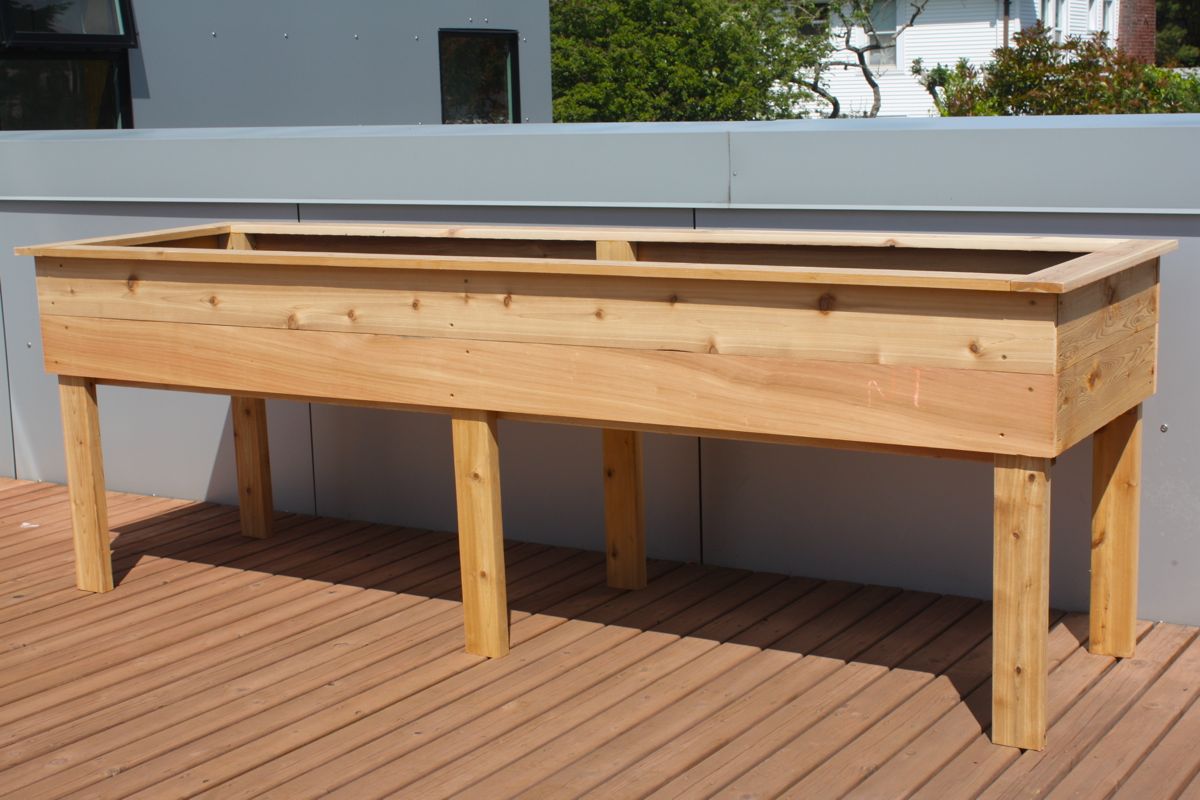
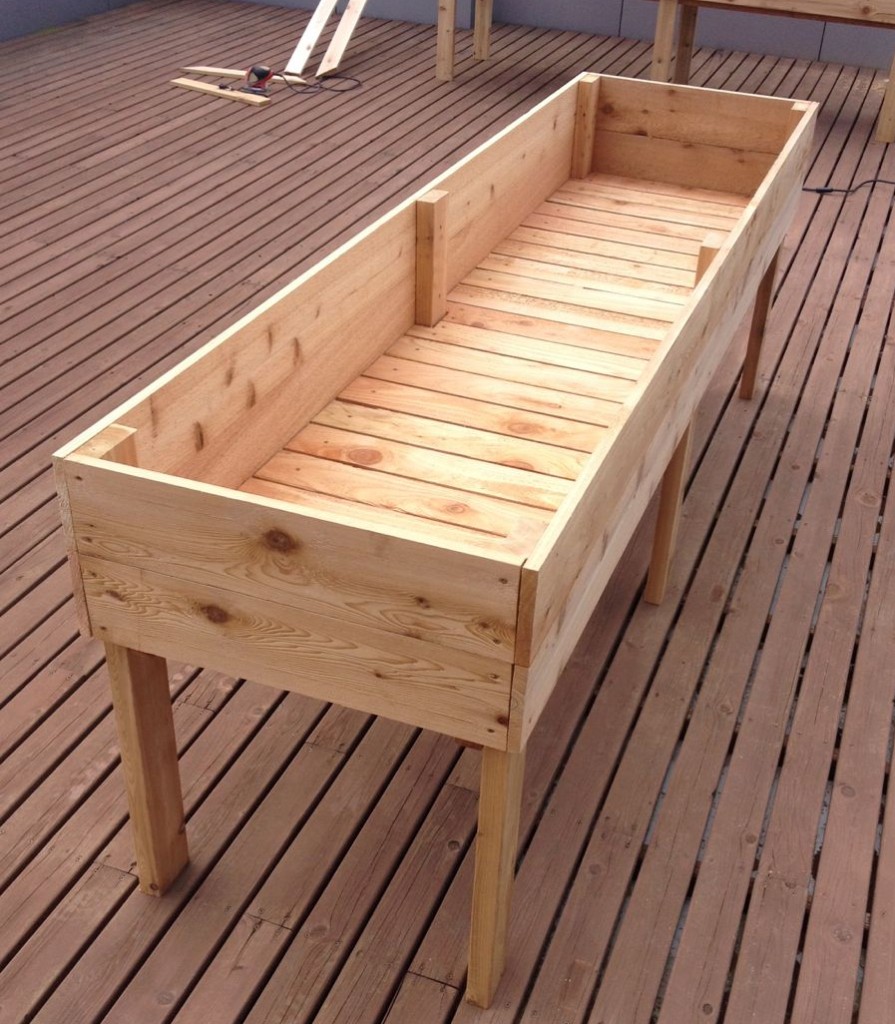
In the end I made 2′ x 8′ beds that could accommodate about 10″ of soil, which are 32″ tall (about desk height).
Want to know how? Here’s an instructable!
How to MAKE a STanding PLanter
You’ll need …
LUMBER:
- 2×4: 6 @ 32″ long
- 2×2: 2 @ 94-1/2″ long
- 1×6: 4 @ 96″ (or 8′) long; and 4 @ 24″ (or 2′) long
- 1×4: 22-26 @ 24″ (or 2′) long; 2 @ 28″ long; and 2 @ 91″ long
Note on lumber: I used cedar because it’s naturally rot-resistant, but it’s expensive. Tight-knot (“TK”) is cheaper than clear and still does the job. I cut the two dozen 24″ boards from inexpensive 6′ cedar fenceposts that were 4″ wide. Total lumber cost was about $100. I chose not to use less expensive chemical-treated wood out of a concern for leaching.
TOOLS:
- 1-1/2″ galvanized screws
- drill with pilot hole bit and screwdriver bit
- measuring tape
- saw
- carpenter’s square
- landscape fabric
- staplegun
- wood glue (optional)
- sandpaper (optional)
Step 1: Make the sides …
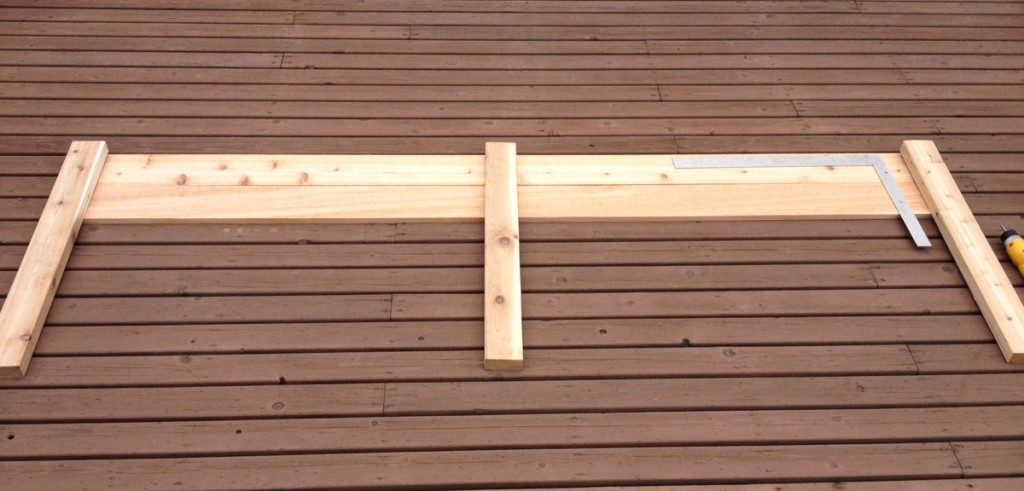
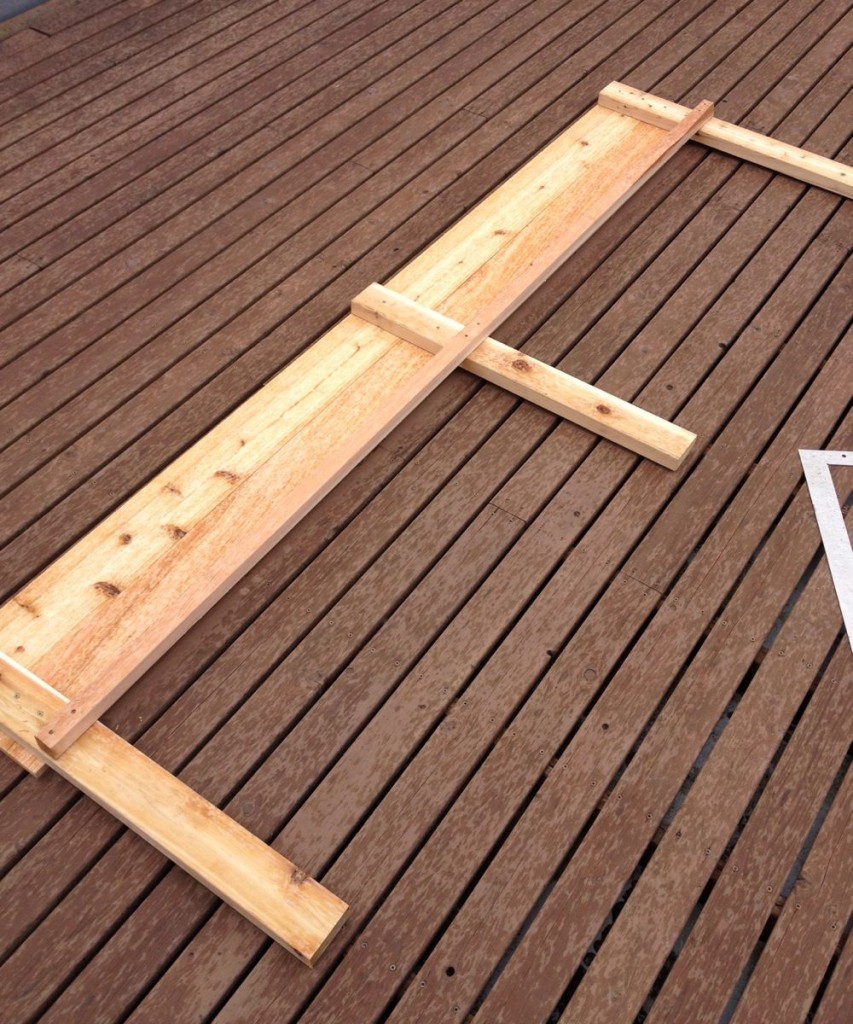
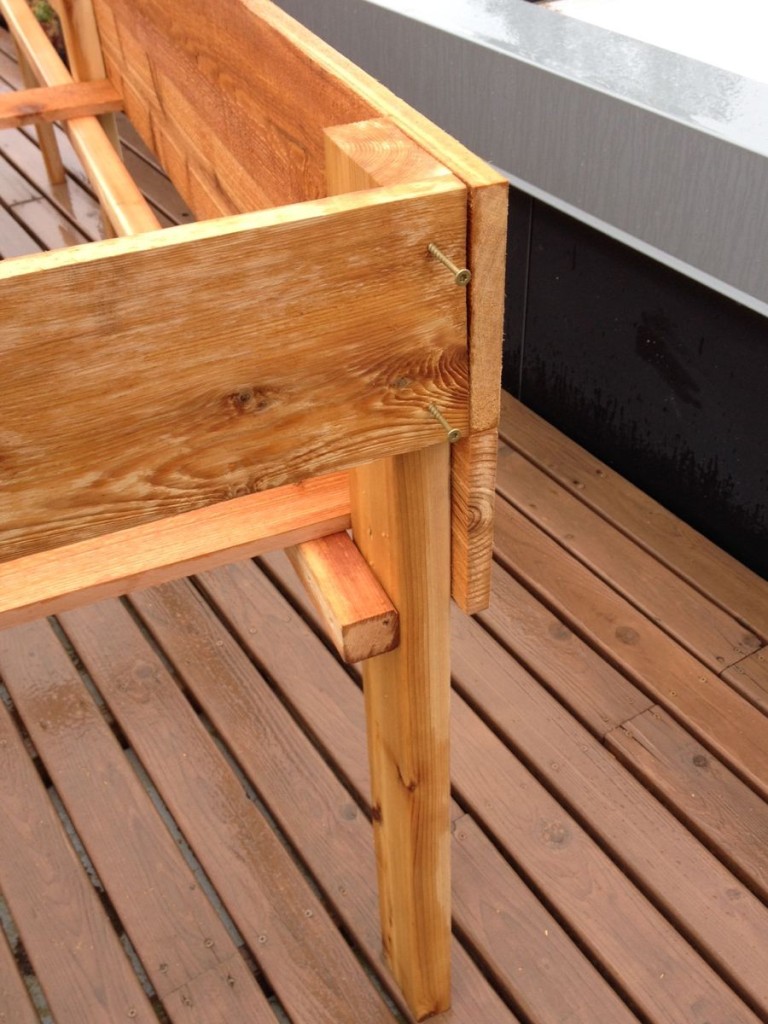
For each side, place a pair of 8′ 2x8s on the ground as shown above. Position three 2x4s so their tops are flush with the upper edge of the 2x8s. These will be the legs. The outer legs should be spaced 3/4″ in from the ends of the 2x8s. The middle leg should be centered. I used one screw per joint, then flipped it over and used a pair of screws for each joint. I drilled a pilot hole for each screw I drove through a 1x board.
Once the legs are attached, add the 2×2 floor support beams so the top surface is even with, or just above, the bottom edge of the 2x8s.
Step 2: Attach the ends …
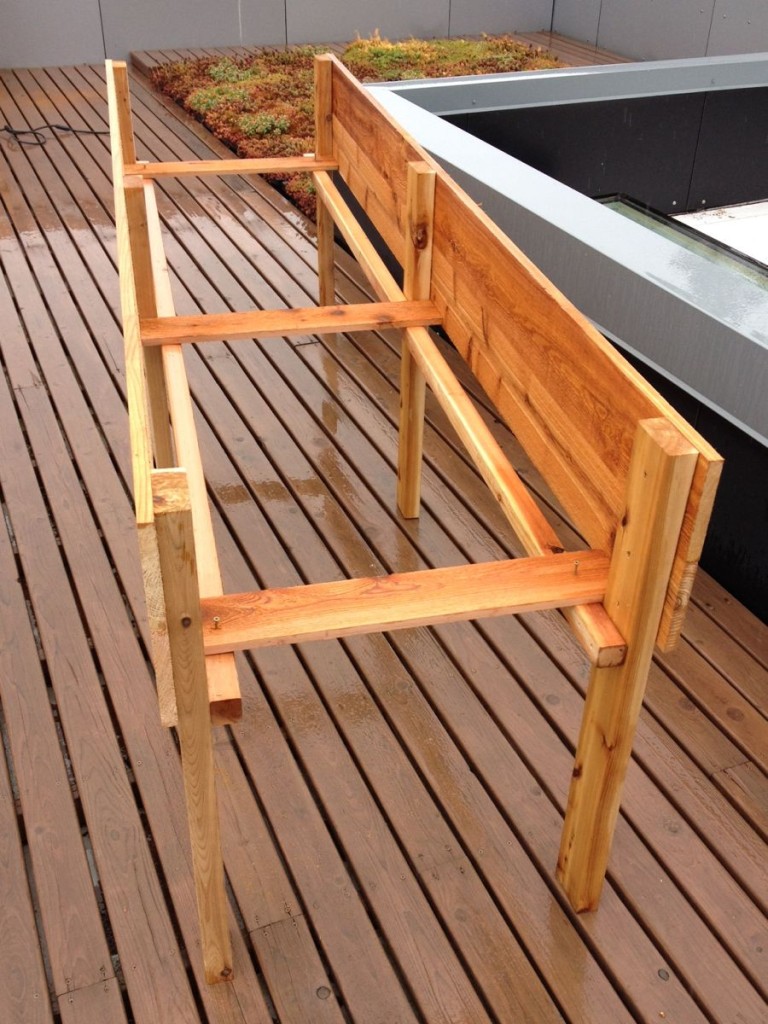
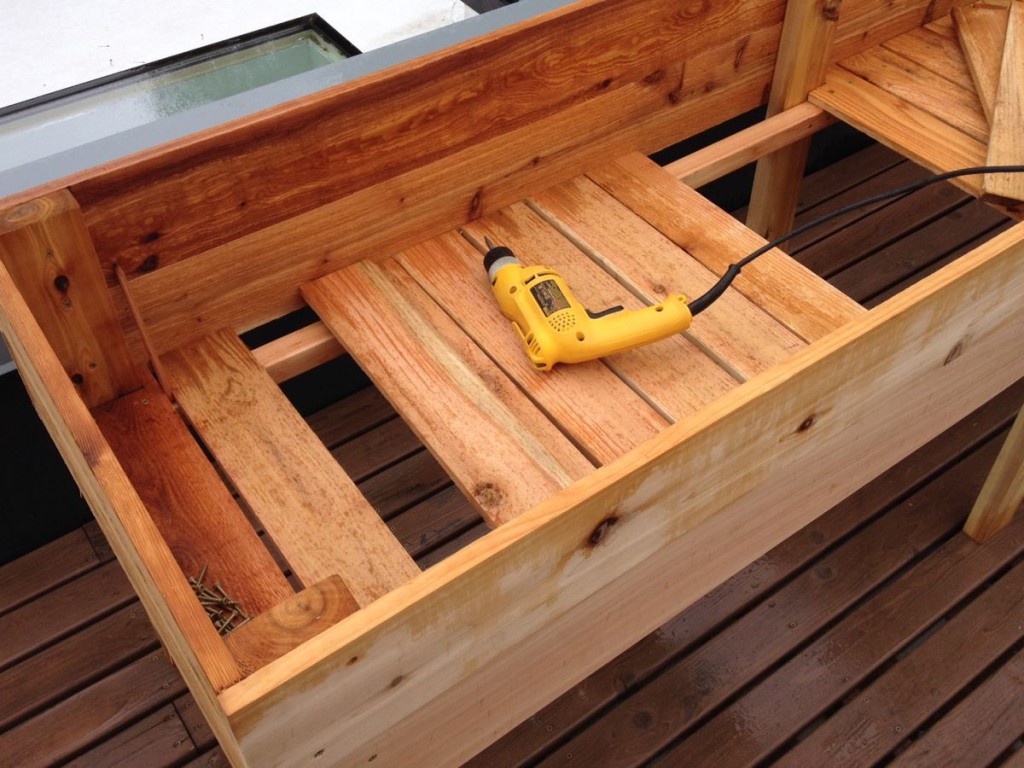
Stand your sides up and face them toward each other as shown above. Using your square and an assistant, space the walls apart by temporarily fastening a few of your 24″ 1x4s to the floor support beams, along the length of the structure. I used three, positioned as shown.
Fasten your 24″ 2x6s to the top ends of the legs. They’ll fit snugly between the walls. For each end, attach the top one first, then the bottom one. After both ends are complete, remove your temporary spacing boards.
Step 3: Attach the floor …
Line your 24″ 1x4s along the floor support beams, spacing them anywhere from 1/4″ to 1/2″ between adjacent boards, for drainage. Once your spacing is set, attach them to the floor support beams using 1 screw each.
Because this design has the legs on the inside of the structure, the width between the walls will be 24″, but the width between legs will be about 21″. If you’re using actual 1x4s, which are 3-1/2″ wide, you should only have to shorten three of them. I used 4″ wide fencing posts, so I had to make notched cutouts for the boards that abutted the legs, using a handsaw (it wasn’t too hard).
Either way, it’s best to lay out the 24″ boards before attaching them, to determine spacing and also how many need to be shortened or notched.
So satisfying!
Step 4: Finishing touches …
Line the bottom with landscape fabric to prevent soil loss, securing with your staplegun. I went up the sides a bit because the fabric was 3′ wide, but you’ll be fine as long as the floor is covered.
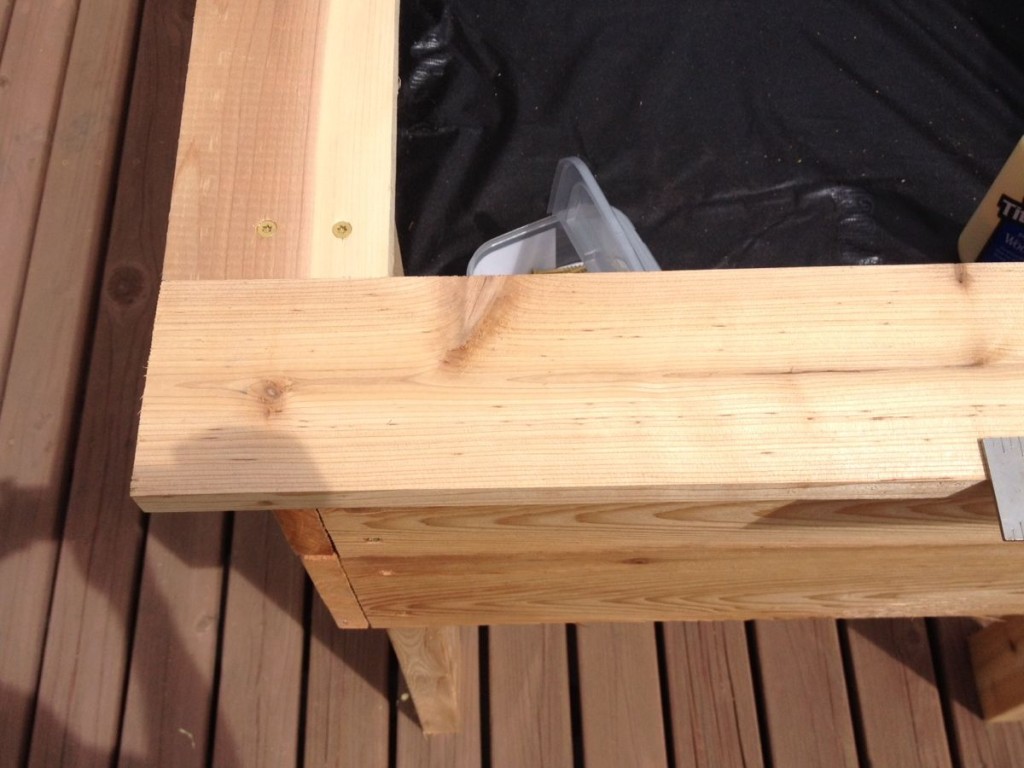
Final touch was the lip. I included one because it gives a more finished look, provides a handy place to lay your garden tools or phone, and protects the top ends of your 2x4s. However, it’s certainly not necessary.
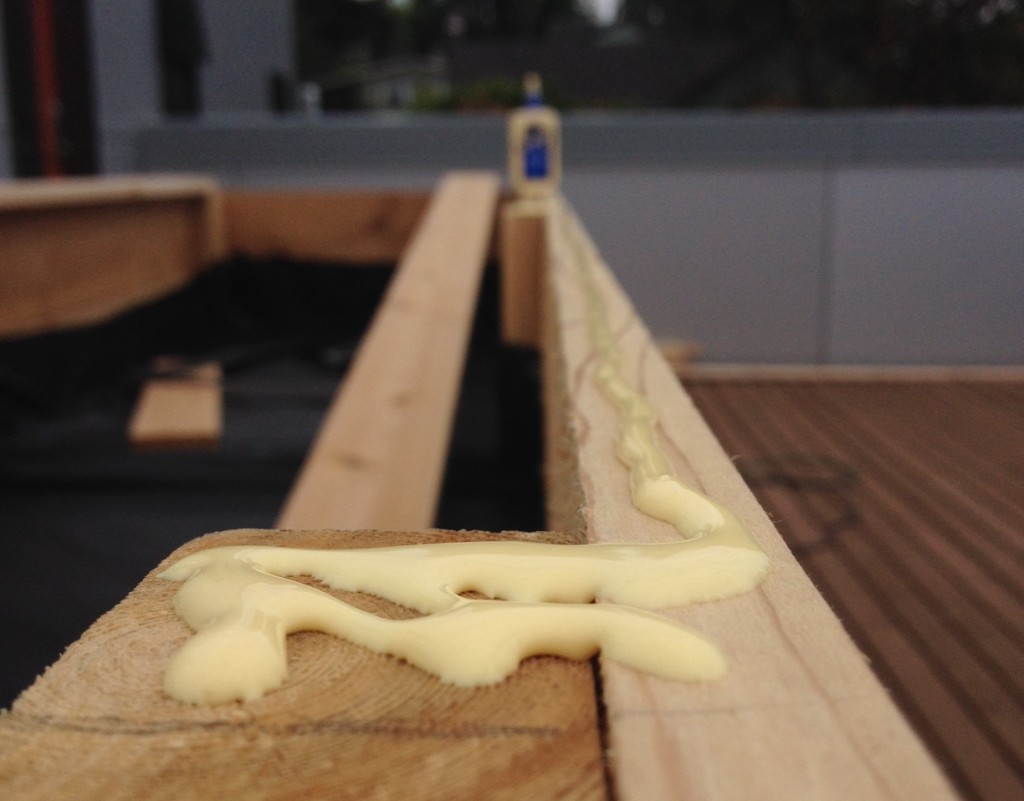
Position the long (91″) 1x4s first, with the inner edge even with the inner edge of the 2×4 legs, centered along the length. Mark the ends with a pencil, apply a strip of wood glue, then reposition the board and fasten with screws.
Note: wood glue isn’t required, but provides stability. Also, I figured that if there was a lip, it would be unavoidable that the structure would be moved around by lifting the lip, and I wanted to make sure it was secure.
Once the long boards are down, install the short boards the same way.
A note on the lip: I cut all of my lumber to length beforehand except the short lip boards. You want nice, tight joints on the corners, and it’s easier to cover up mistakes by using a longer-than-necessary board you can cut to size once in place.
Finish things up by giving the edges some attention with the sandpaper. I left the wood raw, but the exterior can be stained or treated to maintain a nice color (untreated cedar will eventually grey).
And, done!
So with the above, it’s easy to see how the size can be varied as needed. Make a deeper or shallower bed by adjusting how far from the top the floor support beams are attached (adjusting wall height accordingly). Make a taller or shorter structure by adjusting the length of the legs, although if you get much taller, consider a stabilizing rail (eg, a 1×4 connecting the legs, about 4″ from the bottoms).
As constructed, my planter beds weigh 60 lbs each. Lightweight potting soil weighs about 30-40 lbs per cubic foot, putting these at 500-600 lbs when full (10″ deep) of soil.
Hope you enjoyed this instructable! Please feel free to leave a comment if you have a question.

